Galpi
Projects and repositories
Create a project, connect git repositories, invite members, and shape your chats' environment in the project's settings.
A project bundles repository connections, members and the settings its chats use. Anyone signed in can create one (the administrator can change that in the policy). There are two roles: owner and member.
Creating a project
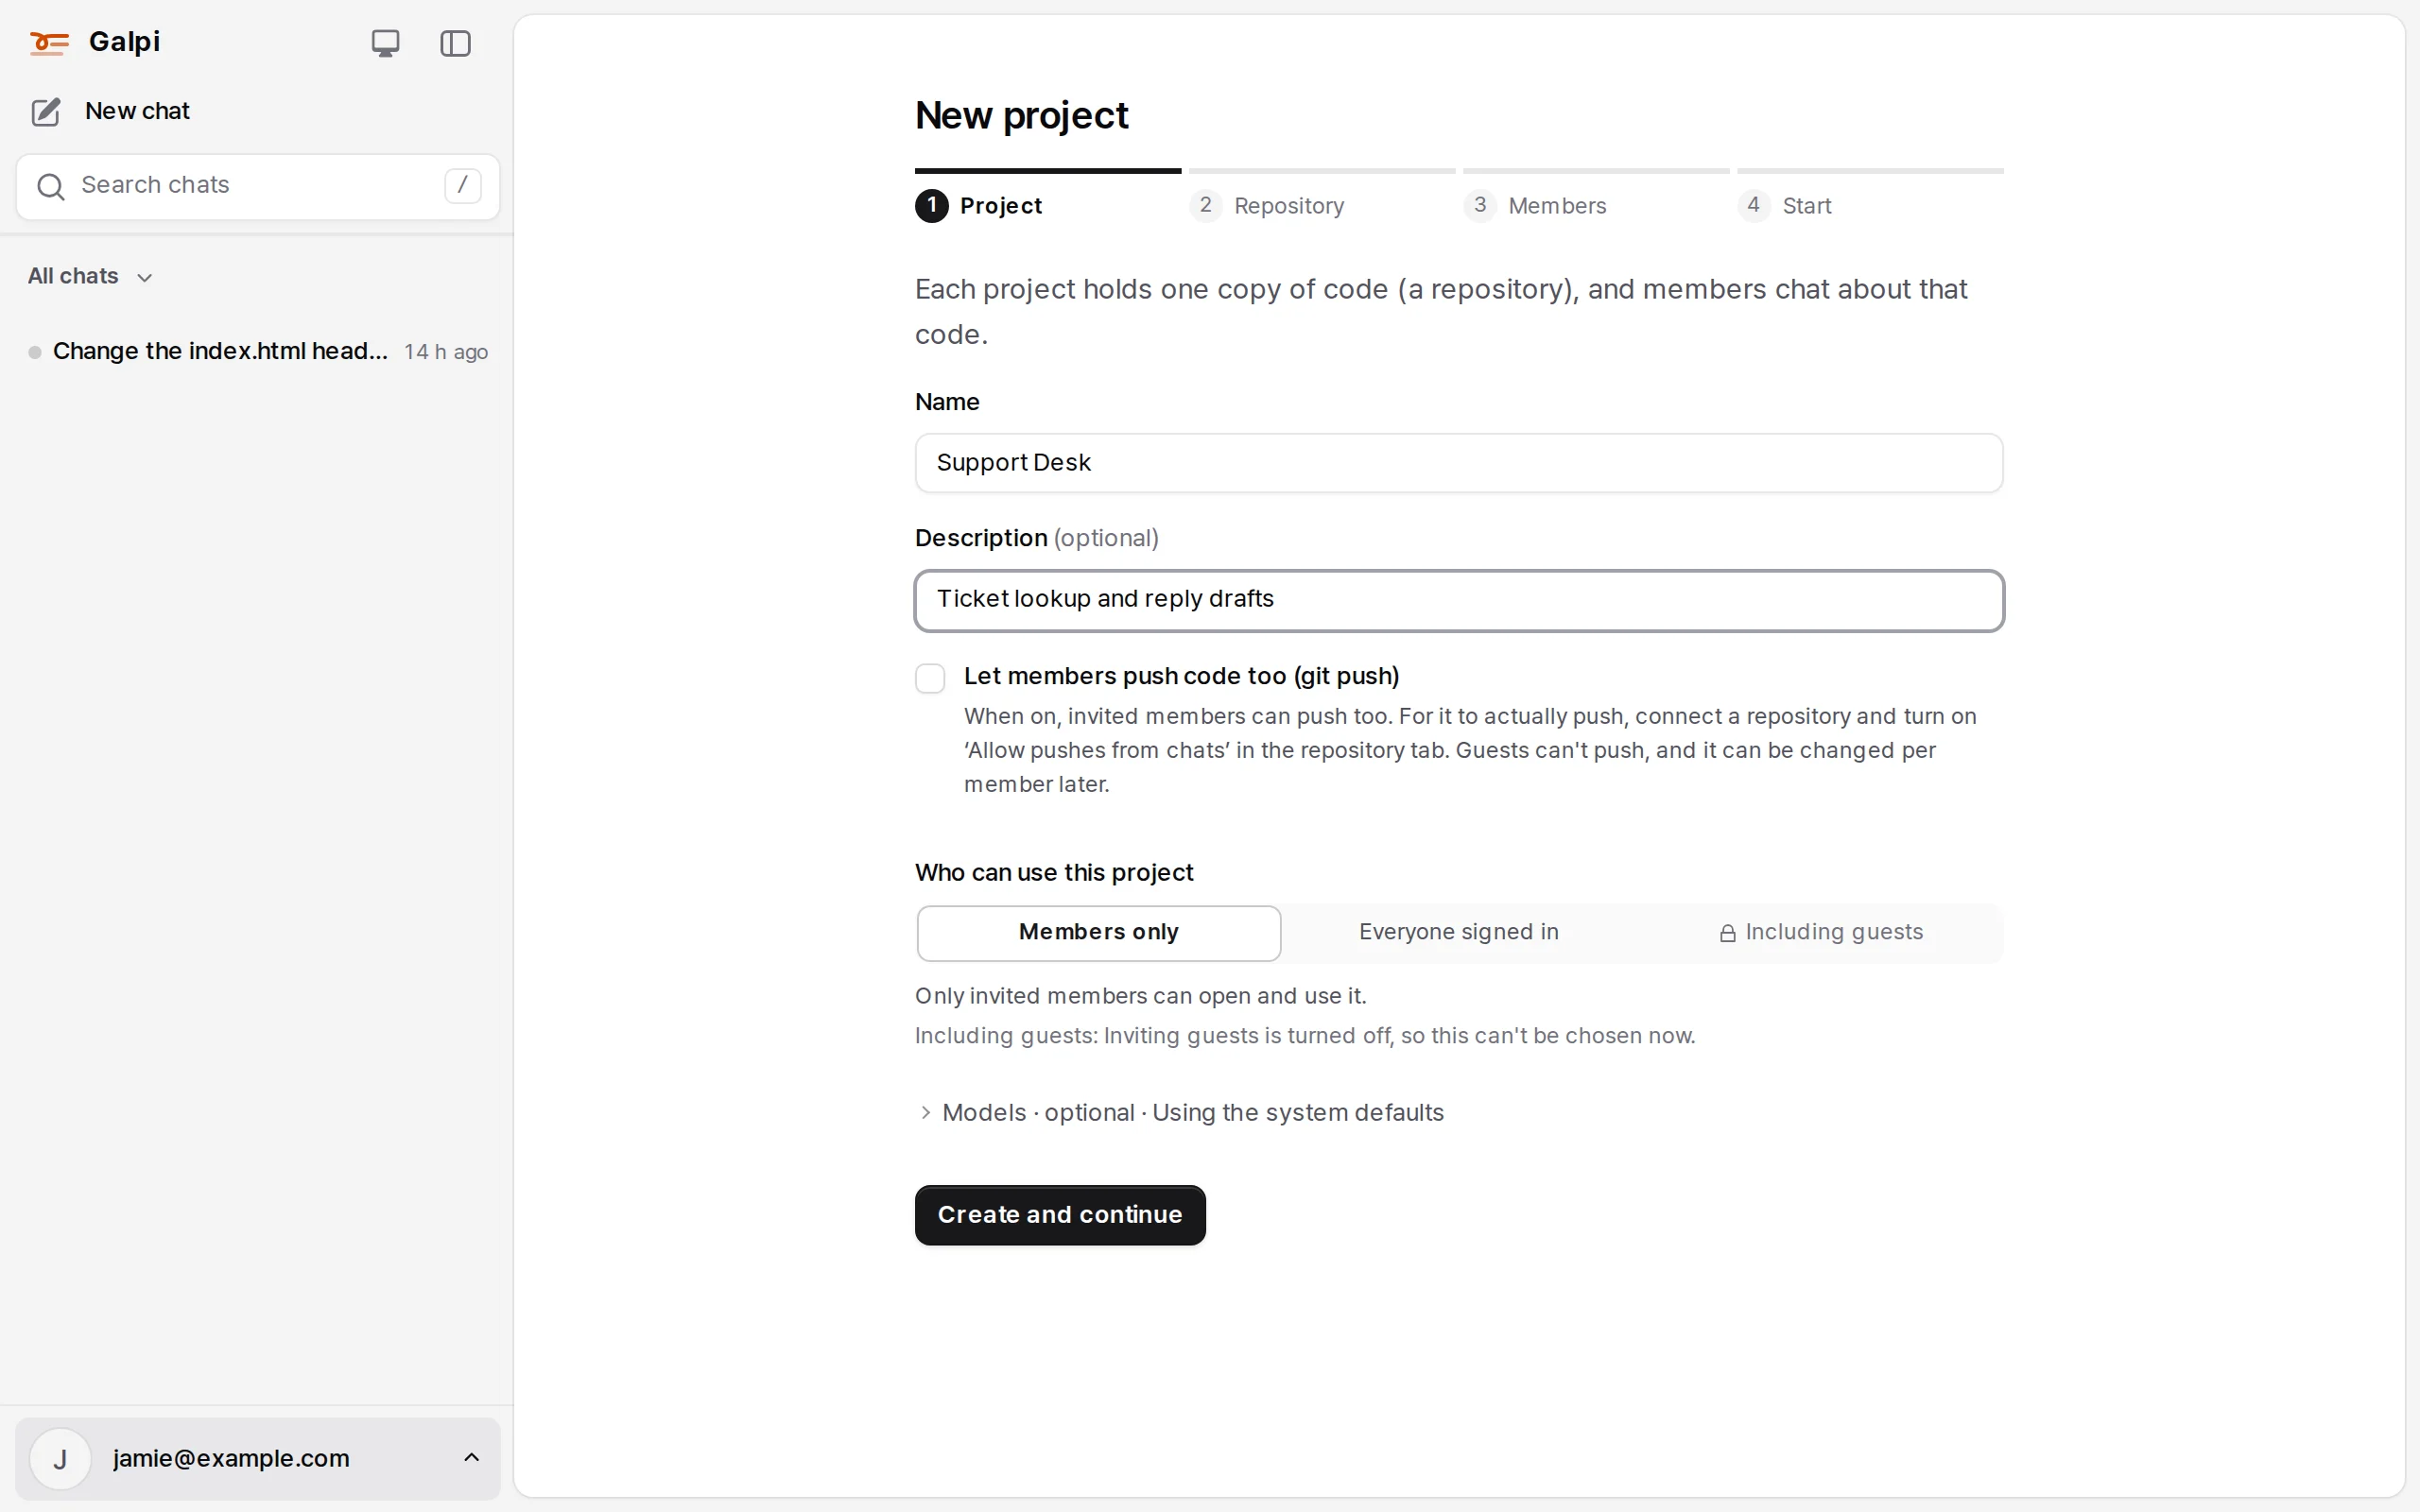
From the account menu, Project settings → new project, or /projects/new. Four steps:
- Project — name, description, whether members may push, who may use the project (members only / everyone signed in / including guests), model.
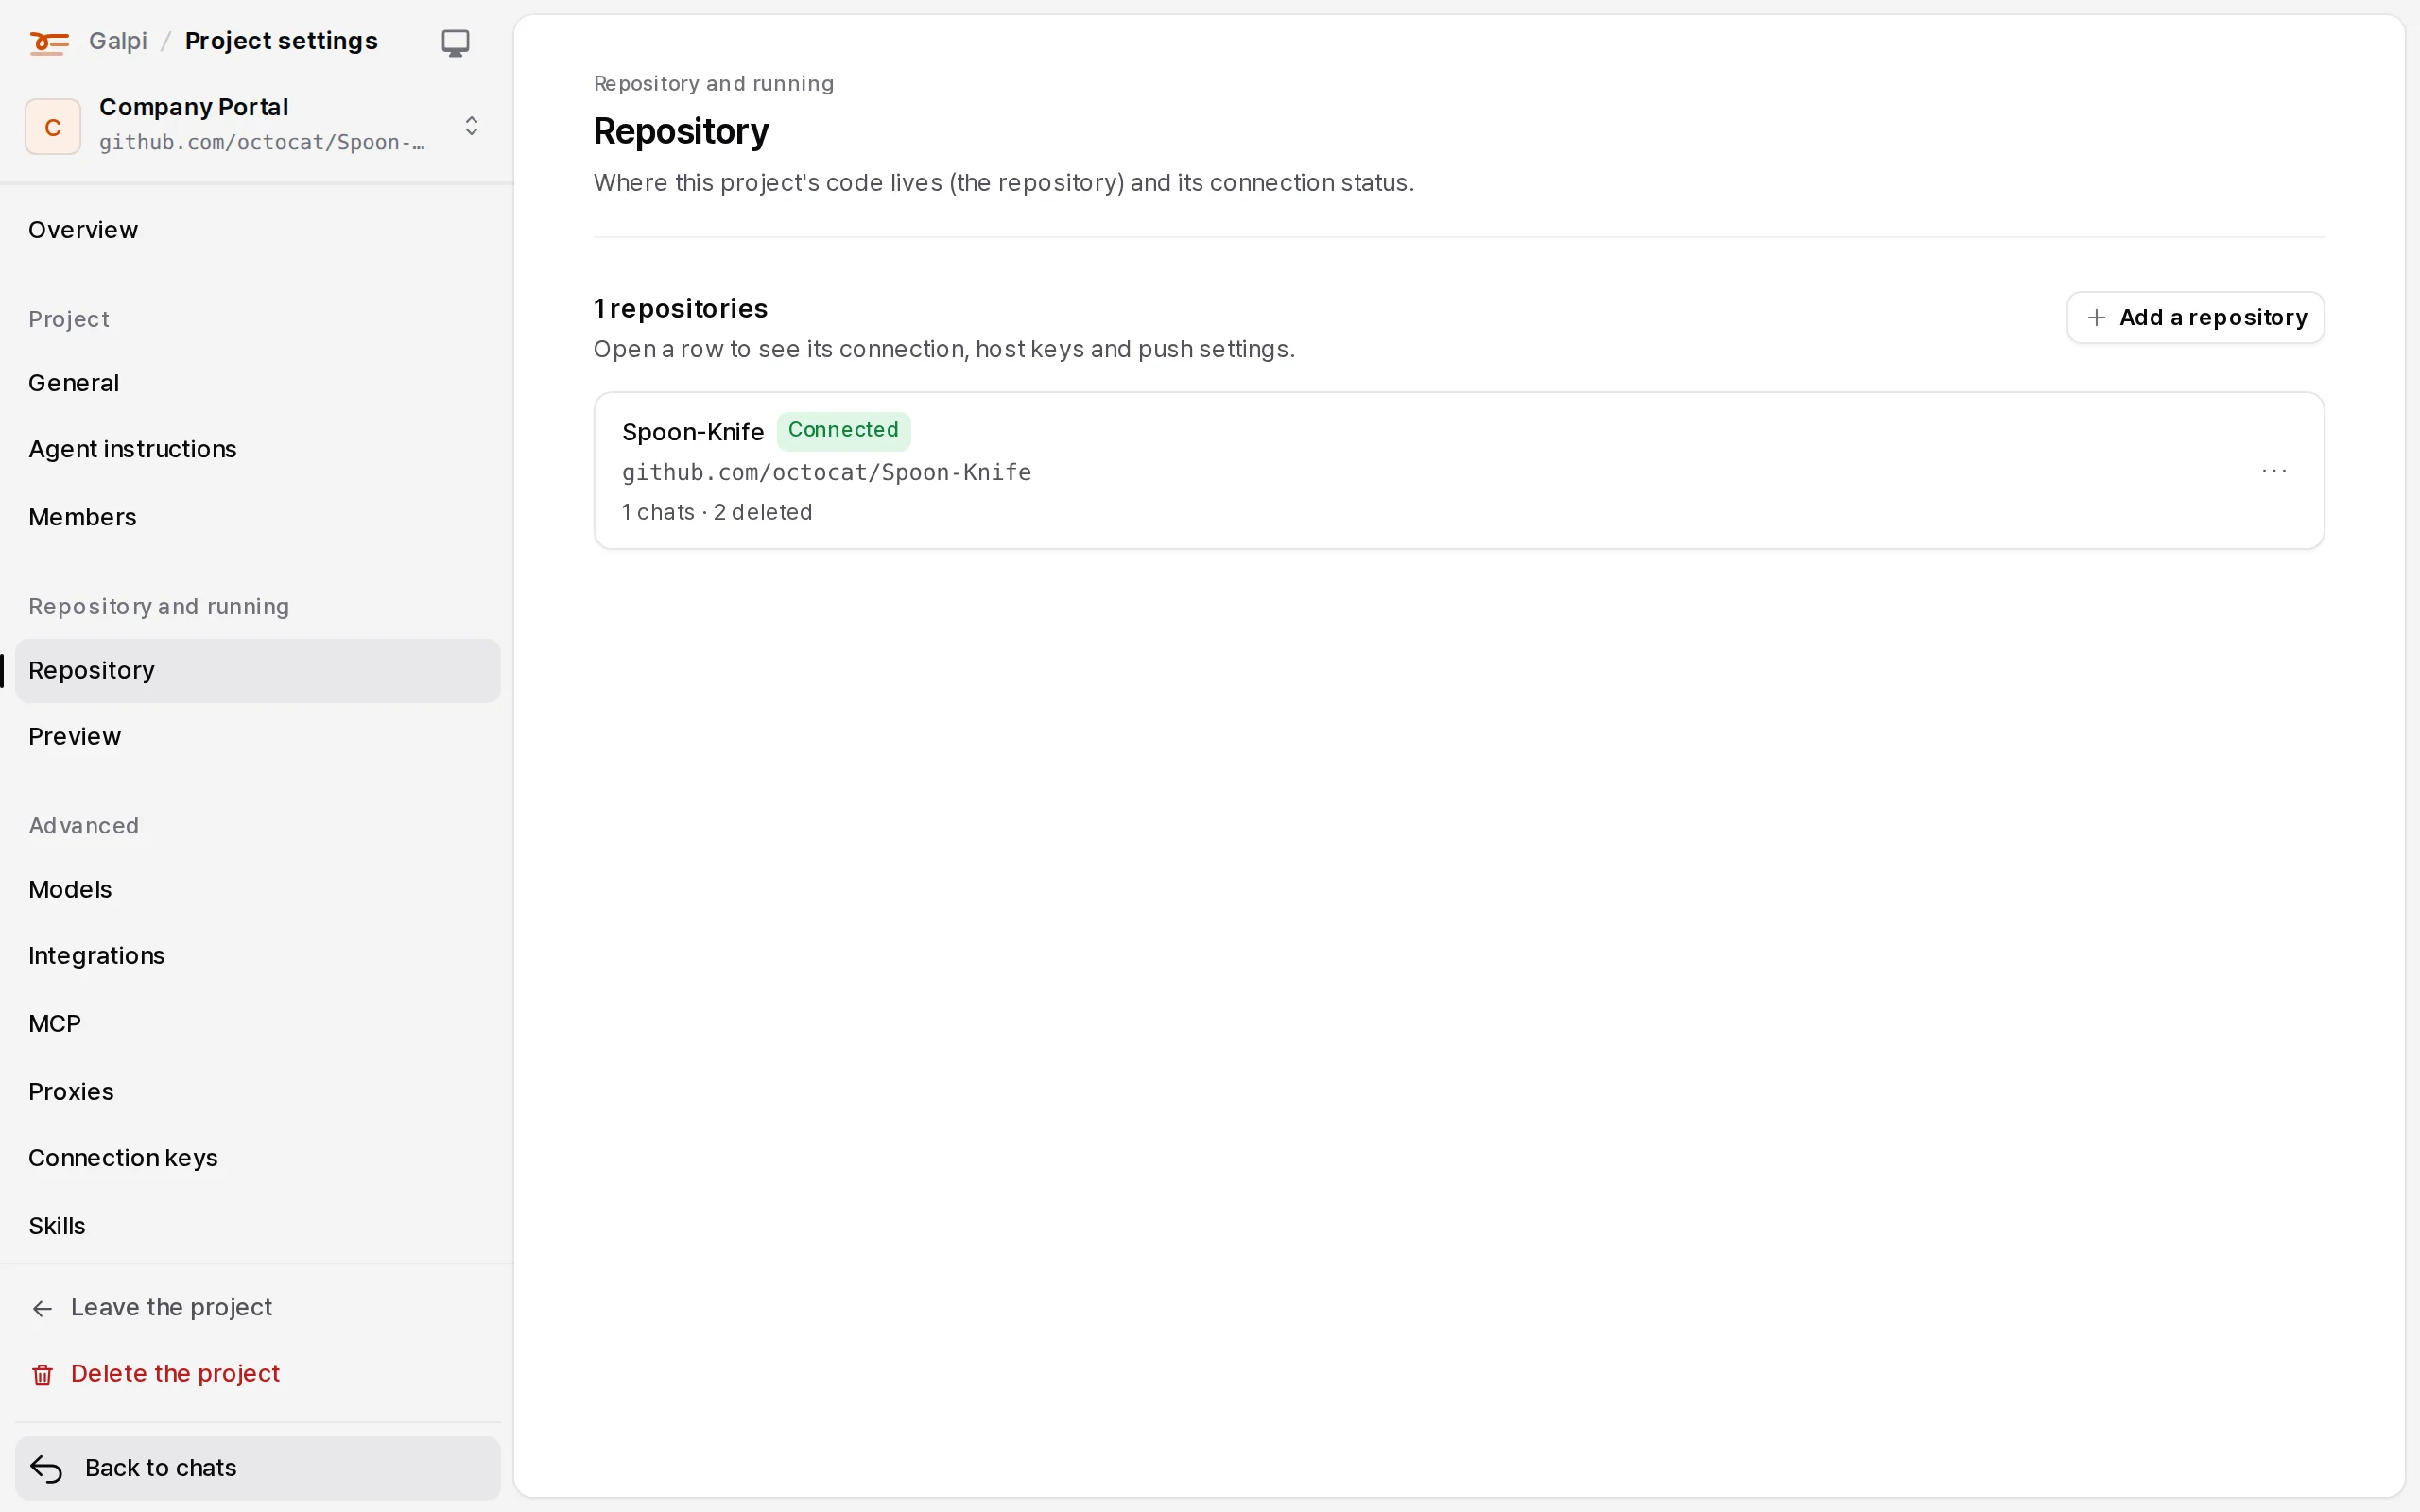
- Repository — paste the repository page's address and pick how to reach it. On save Galpi connects at once and shows the default branch and latest commit.
- Members — invite by email. Can wait.
- Start — chat right away or keep configuring.
Repository credentials
| Way | When |
|---|---|
| Public repository | Anyone can read it. No key |
| Private repository · connection key | An HTTPS access token. A read-only one is recommended |
| Advanced · SSH | A deploy key (Galpi makes one for you to register) or an uploaded SSH key. The host key is scanned, shown and stored at first connection; if it changes, clones stop until you accept it again |
| Start from an empty repository | With built-in repositories (Forgejo) on. Pick a starter: README only, web app (Vite + React), Node API, Python |
Credentials belong to their repository and stay on the server. They are written to a private folder on the VM only for a clone or an update, then removed. HTTPS repositories behind a company CA or a self-signed certificate can be trusted by uploading the certificate.
Project settings
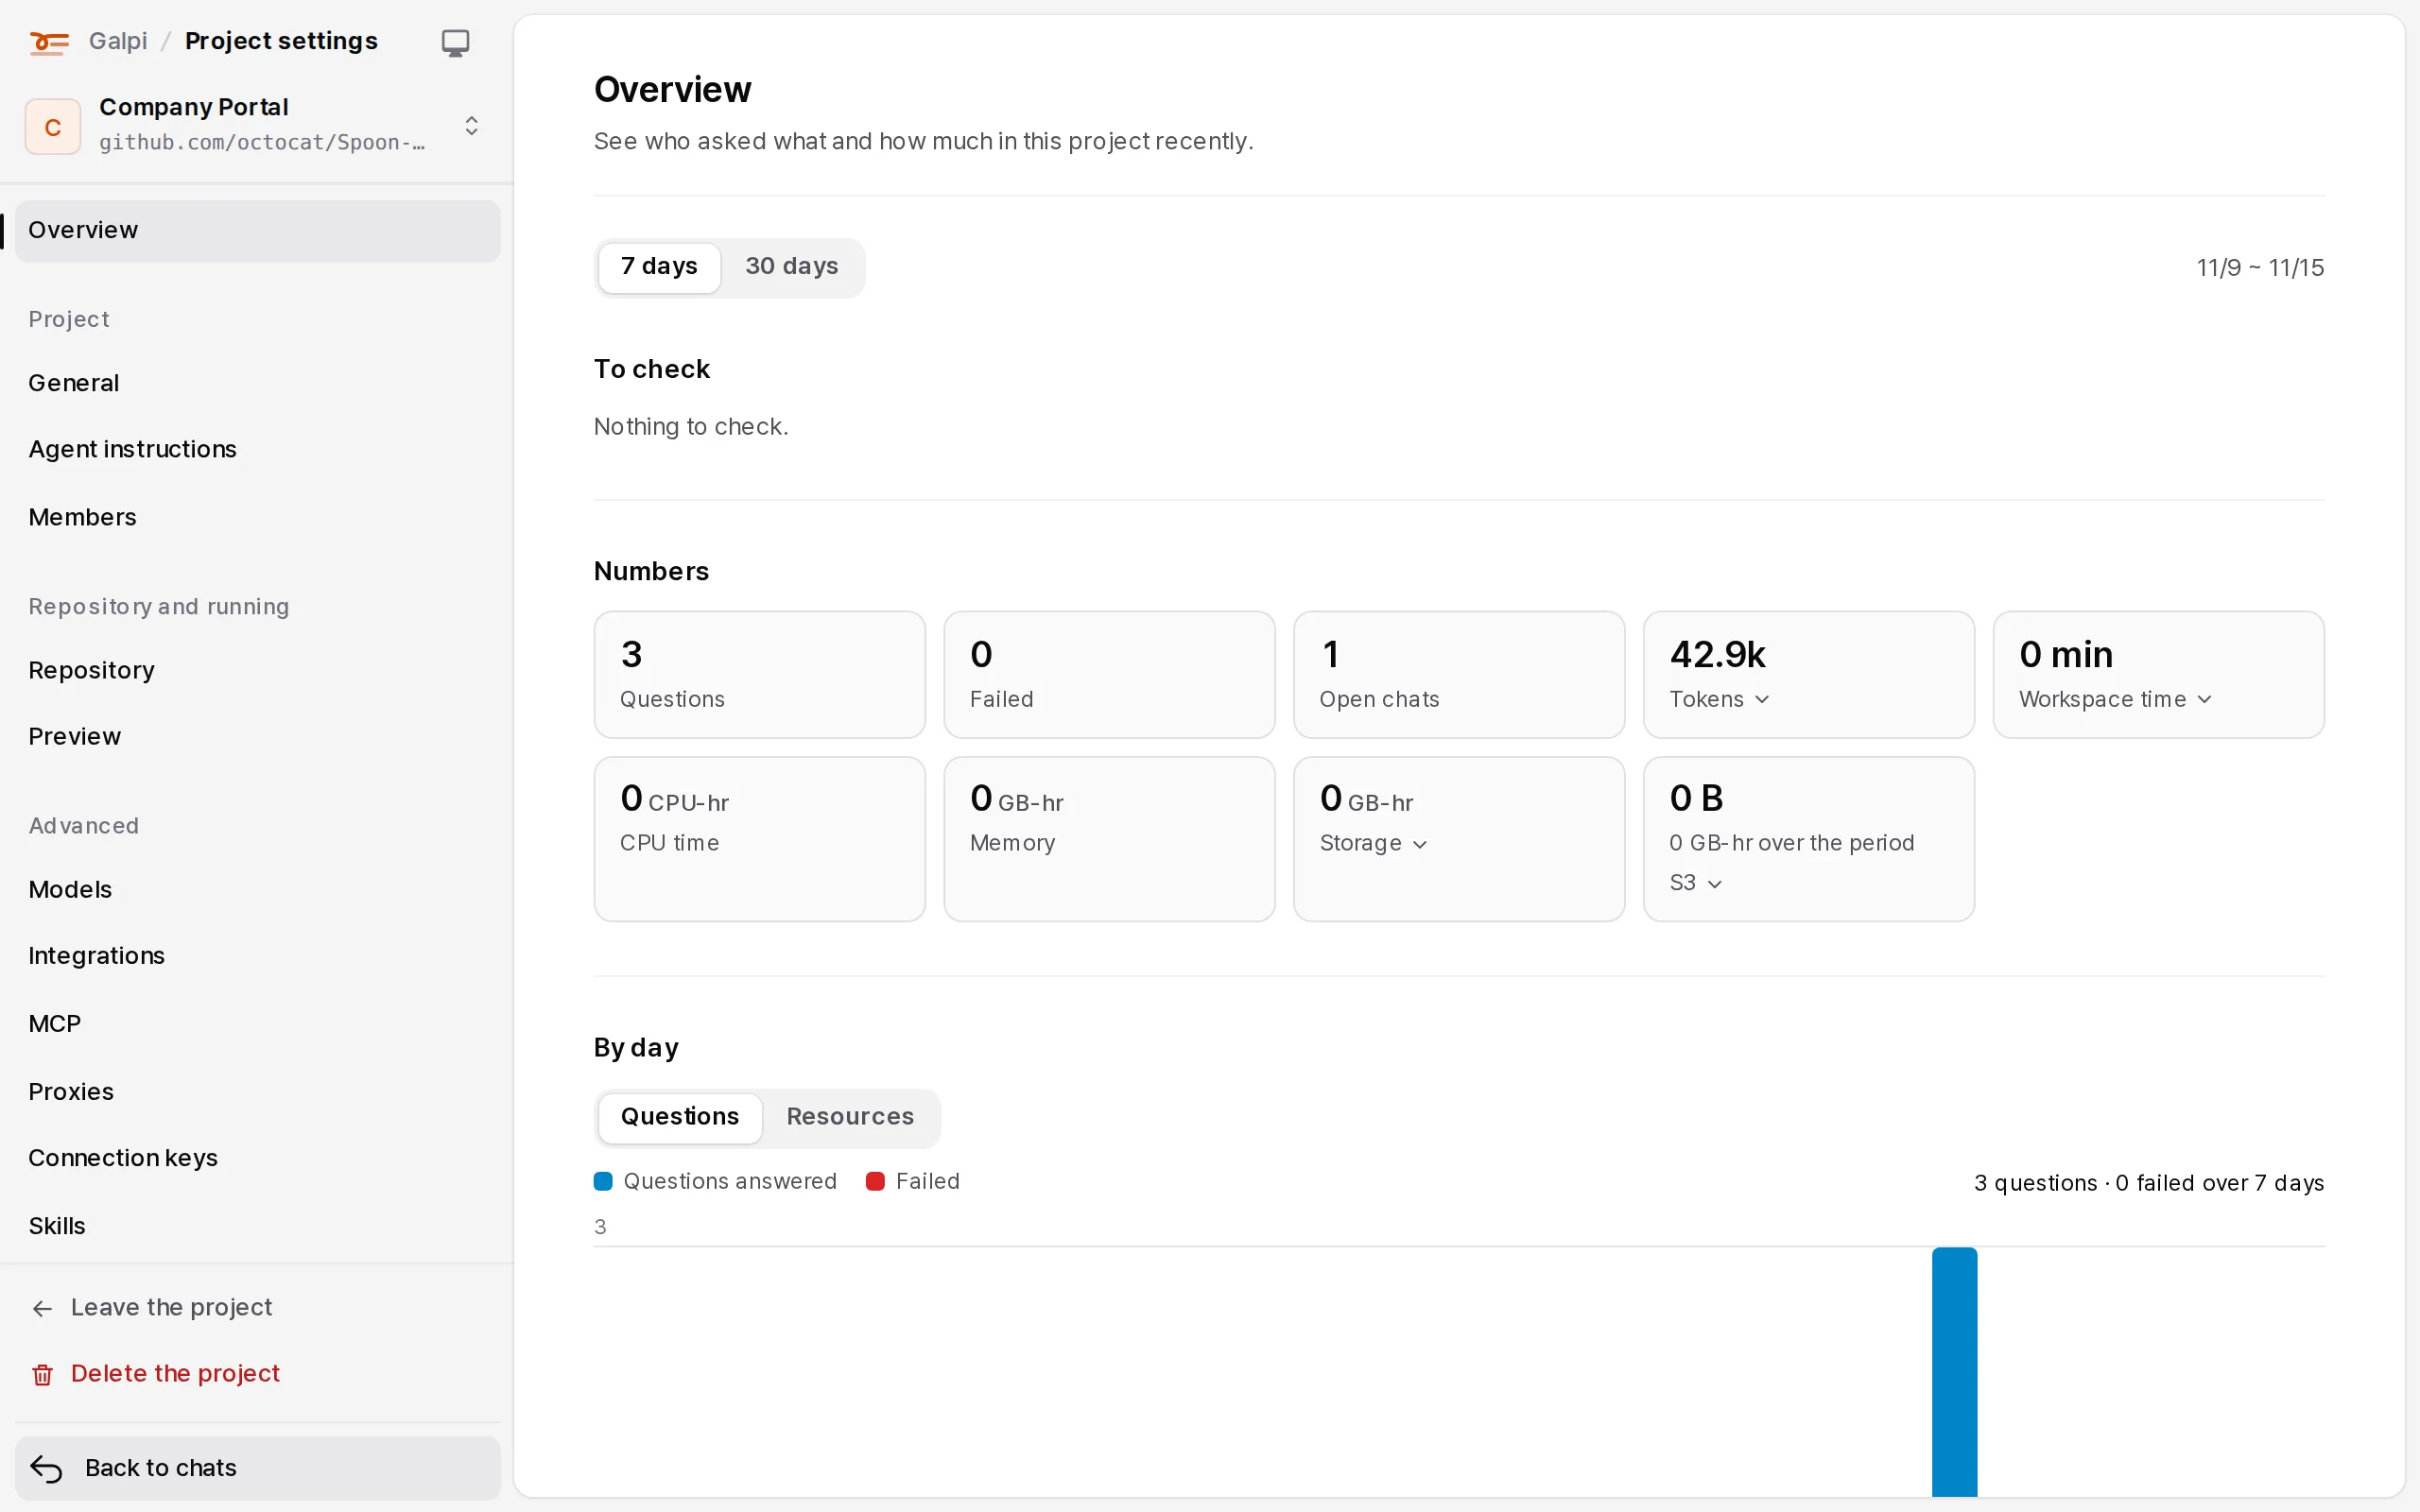
The list on the left of /manage/<project> is grouped like this. Some tabs are for owners only (Overview, Agent instructions, Connection keys, Activity).
| Group | Tabs | What you set |
|---|---|---|
| Overview | Questions, tokens, VM hours, storage, questions per day | |
| Project | General · Agent instructions · Members | Name and permissions, instructions for every chat here, invitations and who may use it |
| Repository and running | Repository · Preview | Repository connections and push rules; preview, code editor and workspace size |
| Integrated services | Mothership · Services | Shown only when the administrator connected Mothership or Naru |
| Advanced | Model · Integrations · MCP · Proxies · Connection keys · Skills | Project model, Plane and CI, MCP connections, proxies that hold keys, secrets for the chat, skills to turn on |
| History | Activity | Who changed what |
Proxies and connection keys
Put anything that needs a key, such as an internal API, behind a proxy. The Galpi server adds the key and calls it; the VM only gets the proxy's address. With "for the preview app too", the preview app gets the proxy as well. Connection keys are secrets a chat must have (including each person's own); people add theirs in My connection keys in the account menu.
Members and who may use a project
On Members you invite by email, allow pushing per member and decide who may use the project.
| Setting | Who gets in |
|---|---|
| Members only (default) | Invited members |
| Everyone signed in | Anyone signed in to Galpi can join by themselves (not guests) |
| Including guests | External users too. Only when guest invitations are on in the system settings |
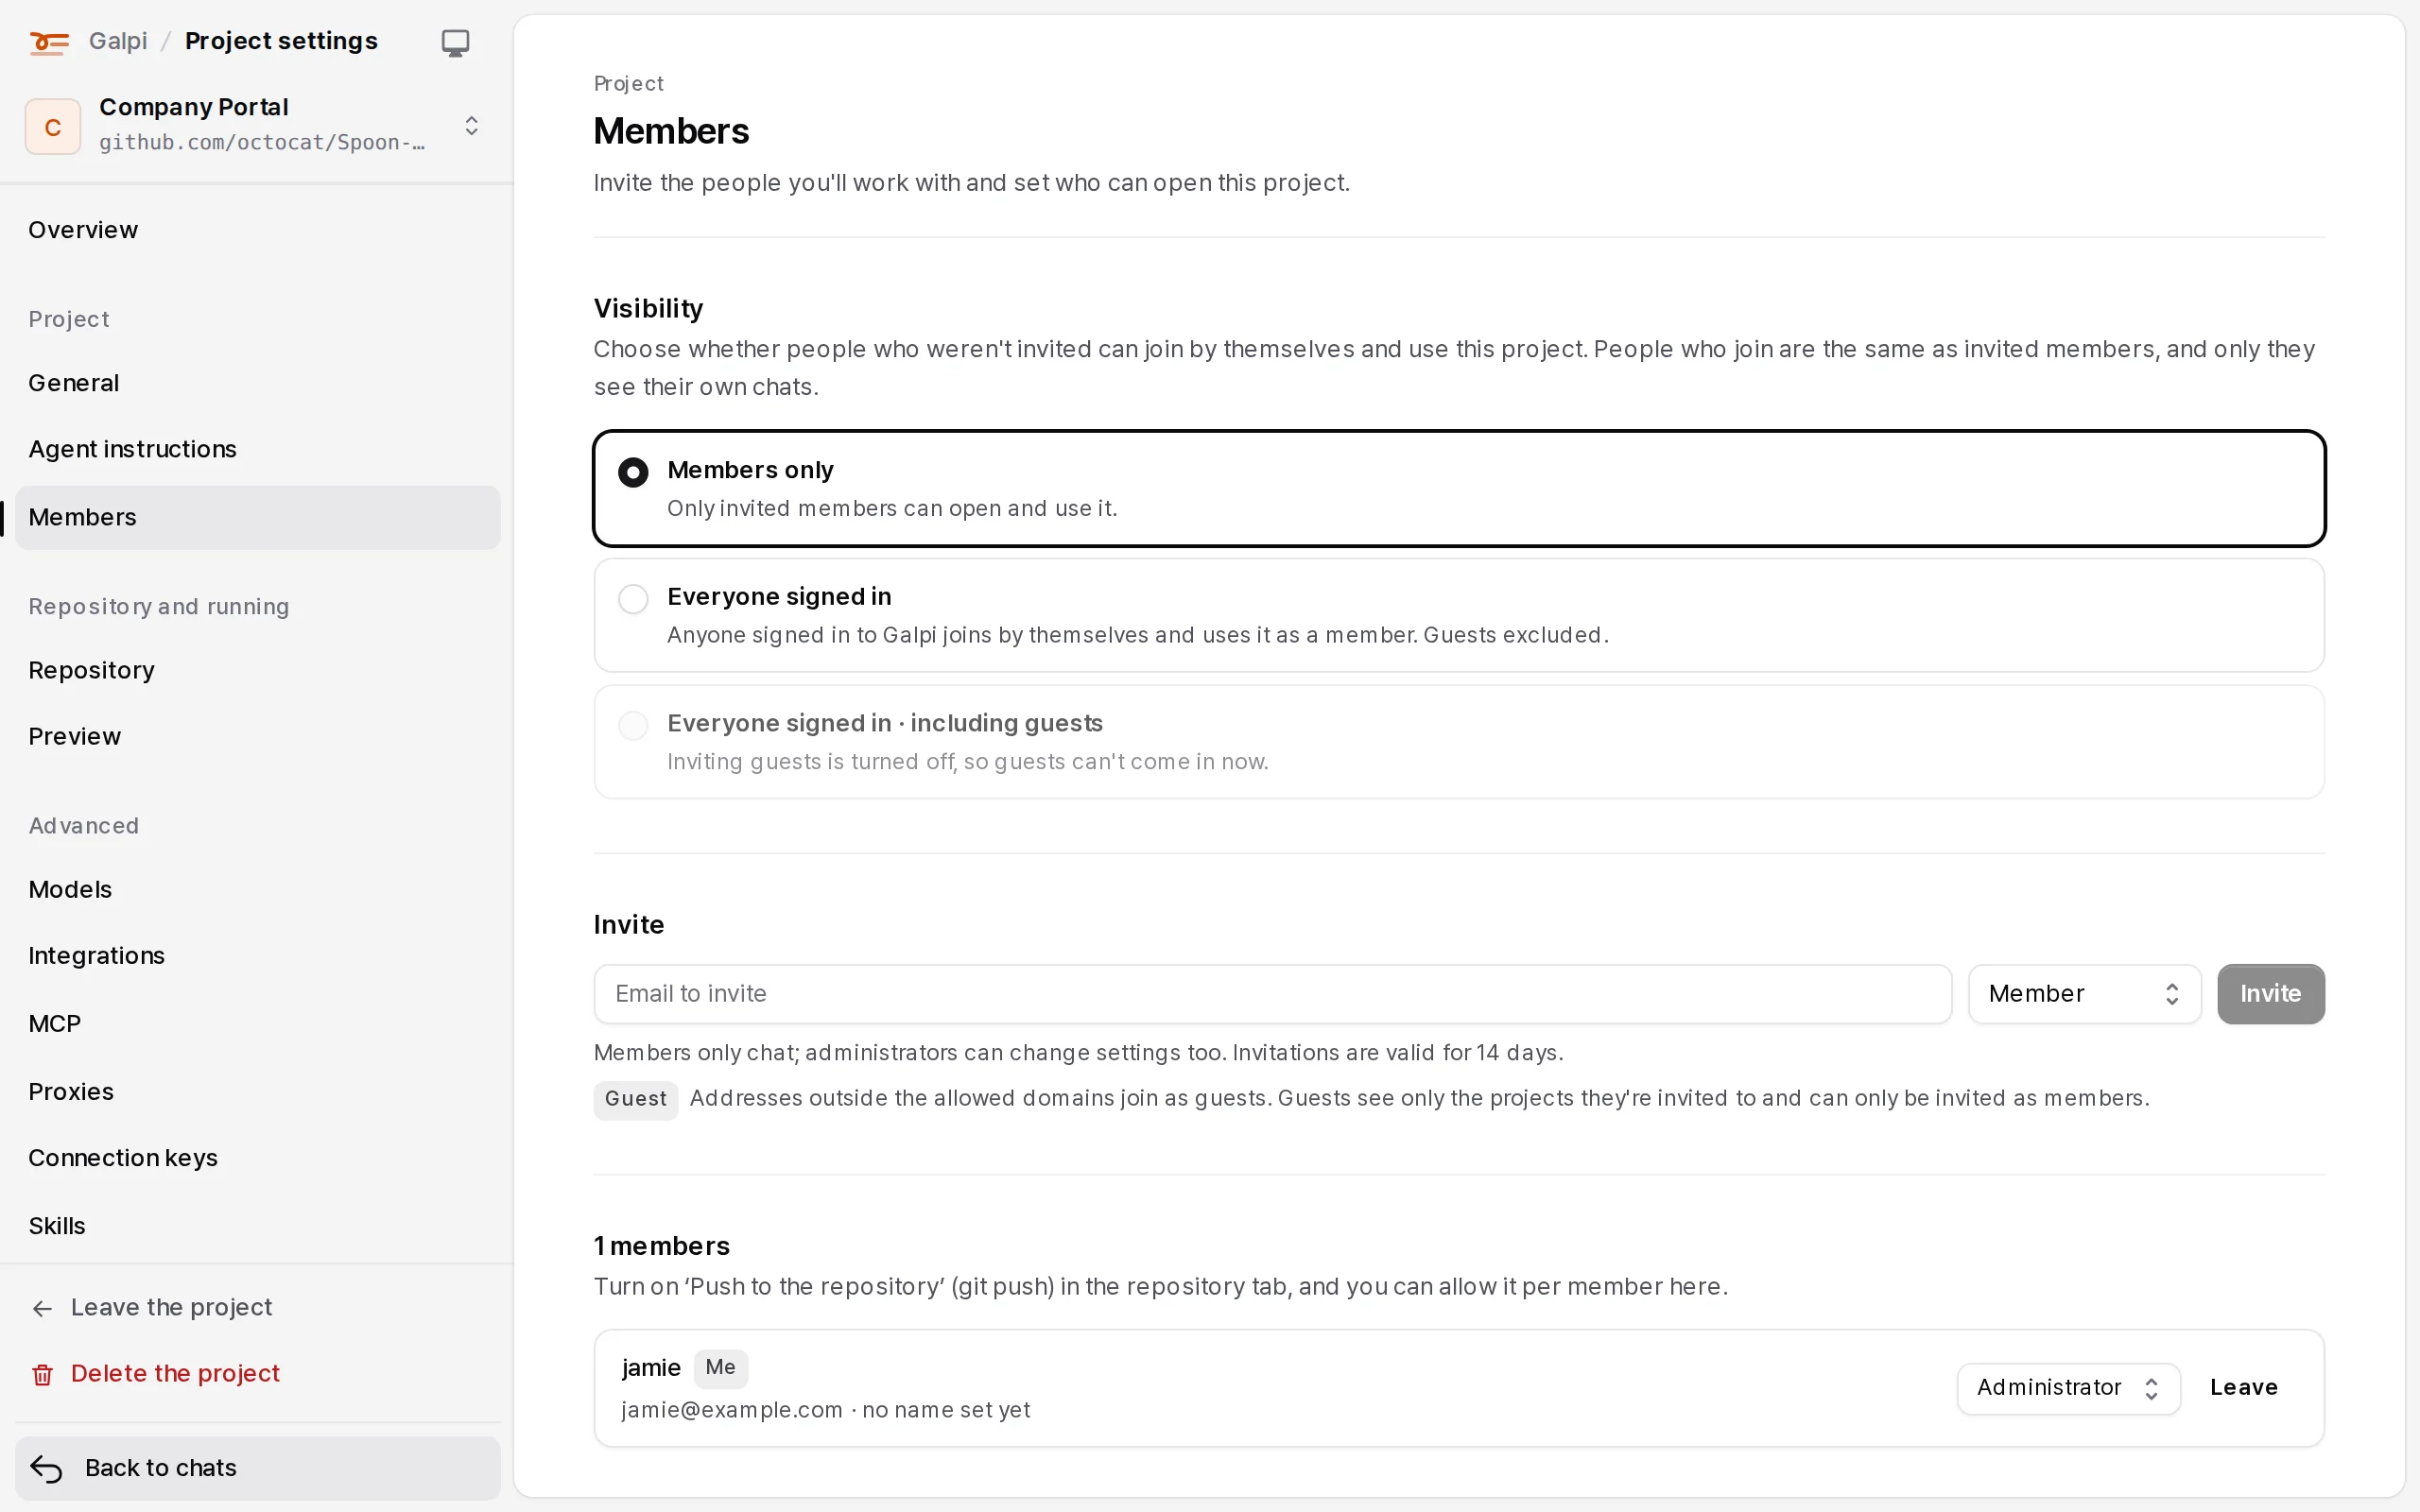
- With a wider setting, people who weren't invited find the project under "Open projects" on the home page and press Join to become a member. Until they join it is only listed. People who joined are members like invited ones, and their chats are their own. Pushing follows the "members may push" setting; guests can't push.
- The tab also shows people you blocked, and people who used the project before joining was required. Invite them, block them or let them back. Someone removed from members can't come back even while the project is open.
- Narrowing archives the chats of people who can no longer get in; when they open one they're told it's members-only now.
- An administrator can turn Allow open projects off in System admin → Settings to make every project members-only.
Agent instructions
The text in Agent instructions is read by the agent in every chat of the project: code rules, test commands, places not to touch. Instructions for every chat on the server come from AGENT_PROMPT (or AGENT_PROMPT_FILE on the server).